Tutorial 4 - Create view using wizard
Step 0 - Start Wizard
This tutorial show, how to create new view using wizard in KPoGre. Wizard is not able to
handle all possible requirements, but it is suitable for most of common situations. I am expect, that
you are basicaly familiar with CREATE VIEW statement.
In left tree view, select ![]() Database
Database![]() Schema
SchemaDatabase -> ![]() Wizard
Wizard![]() view
view
Or select Views folder and make right button click on it to display
object menu.

KPoGre displays wizard for create new view. This wizard have 5 steps.
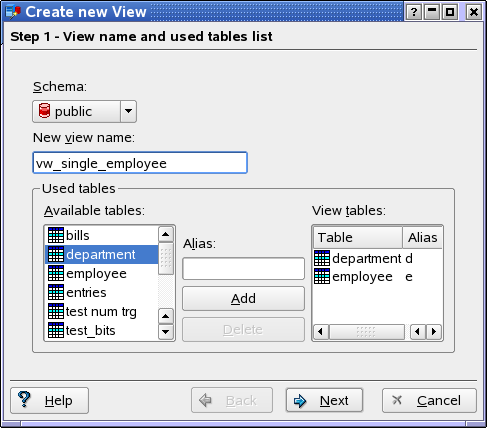
Step 1 - View name
If you start this wizard when Database is selected,
choose schema for new view. When you run wizard from Schema or
Tables folder, actual schema is used.
Type name for new view. Add tables that will be used for output columns and joins. Using one or two letters Alias for each table is good practice.
Step 2 - Define columns
For each table you may add column to view output. If you want to rename column, use AS field.
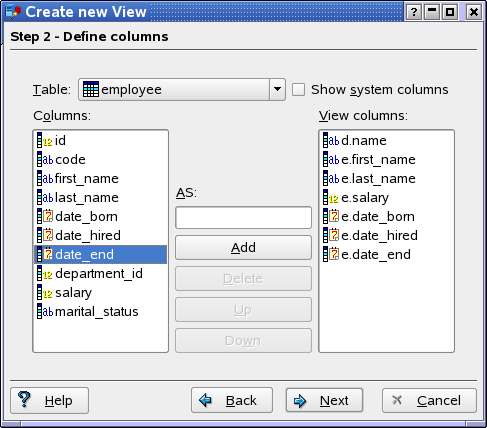
After defining all columns press Next button.
Step 3 - Define joins
If you have more than one table in view, you probably need define joins. Choose Join type. Select tables for joins and also select columns. Selecting more than one column is allowed. Joined columns must have compatible datatypes and selected columns count must match.
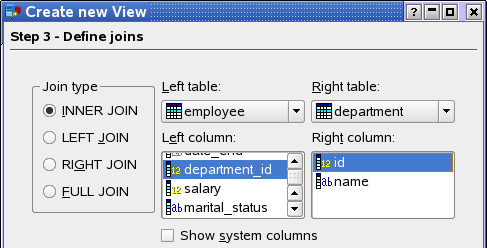
Press Add button in Joins group box. Join definition is included to list. You may repeat this for all needed joins in view.
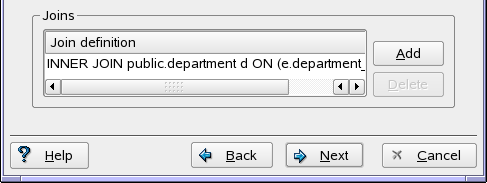
After adding first join, left table is locked and you may change only right table.
Join may be removed from list, using Delete button. After defining all joins press Next button.
Step 4 - Define conditions
In this step you may define conditions to reduce number of output rows. Thi step is optional. Select Table and its Column for condition. Also select Condition type and enter Value.
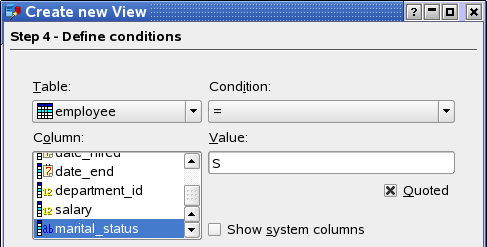
Press Add button in Conditions group box. Condition is included to list. You may repeat this for all needed conditions in view.

Condition may be removed from list, using Delete button. After defining all conditions press Next button.
Step 5 - Review SQL statement
In this step, SQL statement for create view is displayied for your check. You may modify it, if you understand, what do you do.

When you press Next button command will be send to server.
Step 6 - Check operation result
Finally, check operation result. If you get any error, you may go Back
and try make changes and retry step 5.